This setup procedure will cover the basics of setting up and managing Sharp User Control on the 2016-newer Sharp devices. This procedure will result in the copier being locked out and requiring authentication to copy, scan, print, and fax. We will be covering the following:
- Enabling User Control
- Creating Authority Groups
- Creating Users
- Entering user codes/passwords into Sharp print driver
- View/Save and delete user counts back to zero
Sharp Models these instructions pertain to: MX-3050N, MX-3070N, MX-3550N, MX-3570N, MX-4050N, MX-4070N, MX-5050N, MX-5070N, MX-6050N, MX-6070N, MX-6580, MX-7580
Enable User Control on Sharp Copier
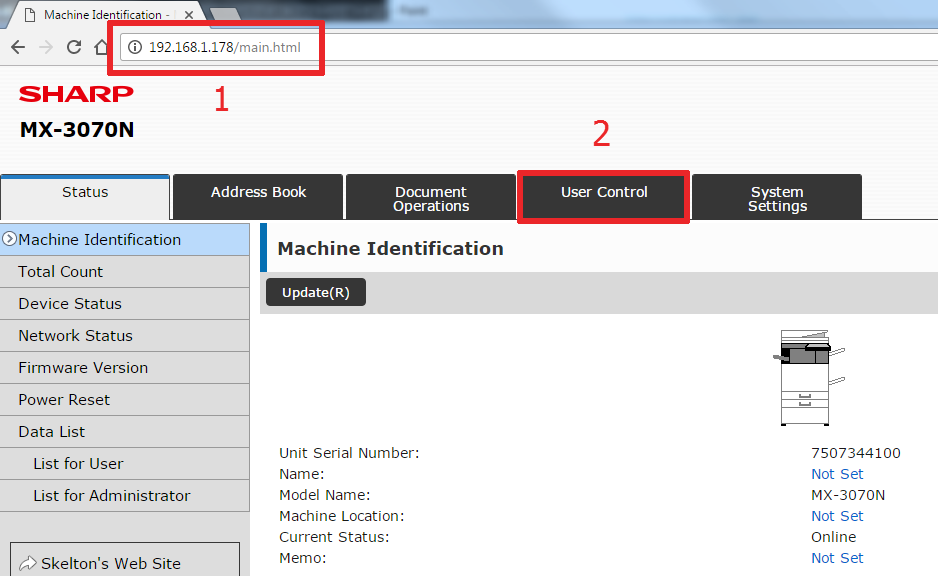
- Open the web interface of the Sharp by entering the IP address into your web browser’s IP address bar. If you don’t know your IP address you can print is using these instructions. Once you have the Sharp GUI open, click User Control at the top of the page.
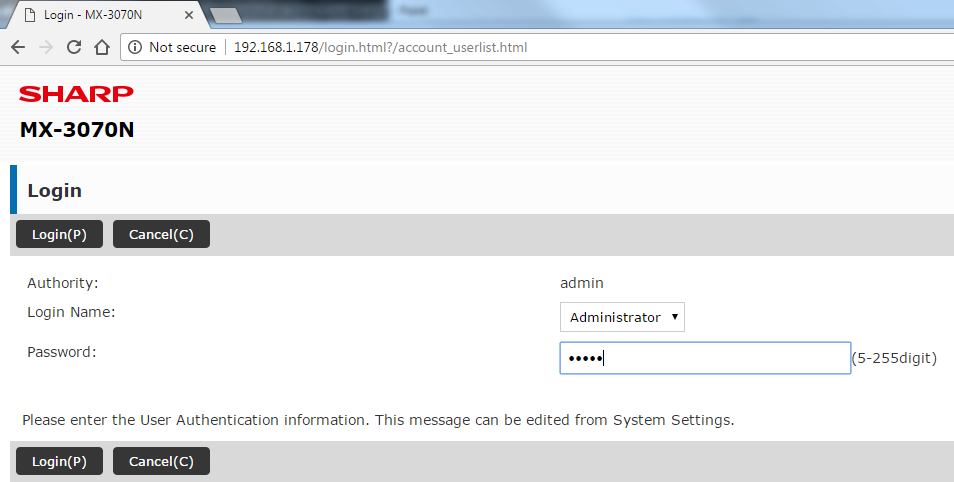
- Login as the Administrator, the password by default is admin
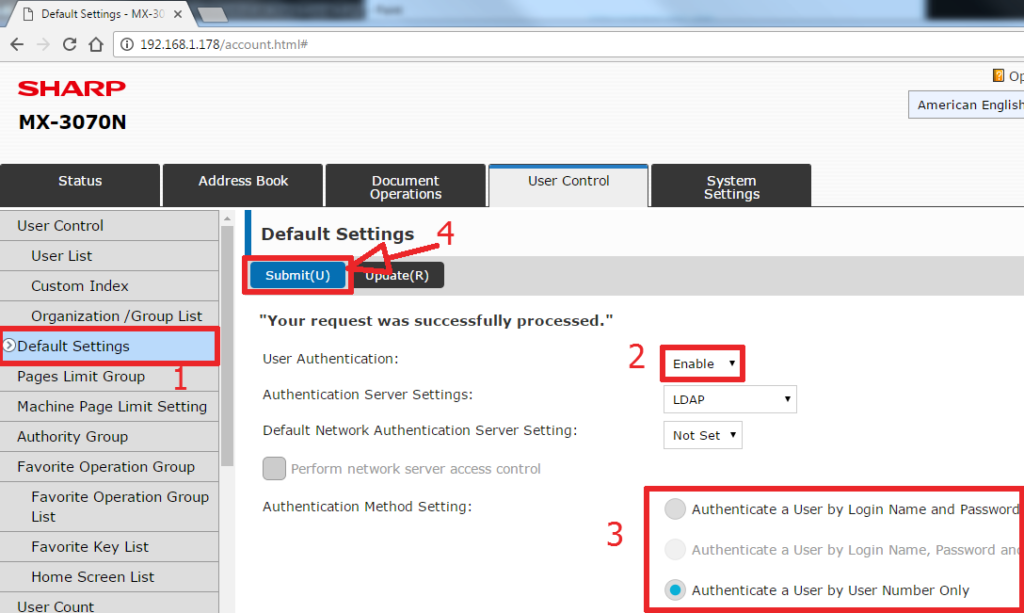
- In the User Control menu, click Default settings on the left. Enable User Authentication, and choose the type of authentication you want to use then click Submit. For the sake of this example, I chose the “Authenticate a User by User Number Only” option, but you can use Active Directory, LDAP, or even use HID cards/badges to login.
Create Authority Groups
4. Click Authority Groups on the left menu of the User Control page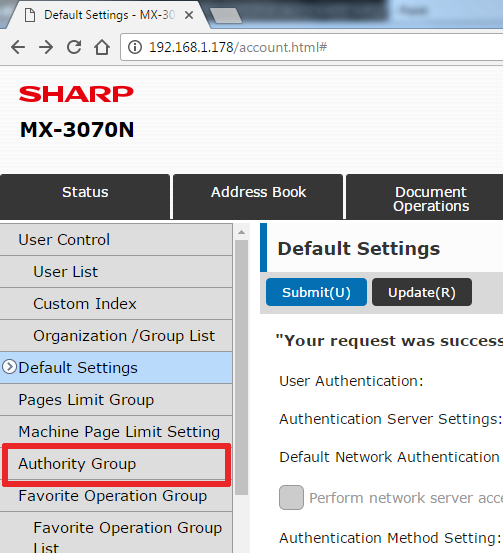
5. Since we enabled User Control, we now have to login again, click the Administrator Login option.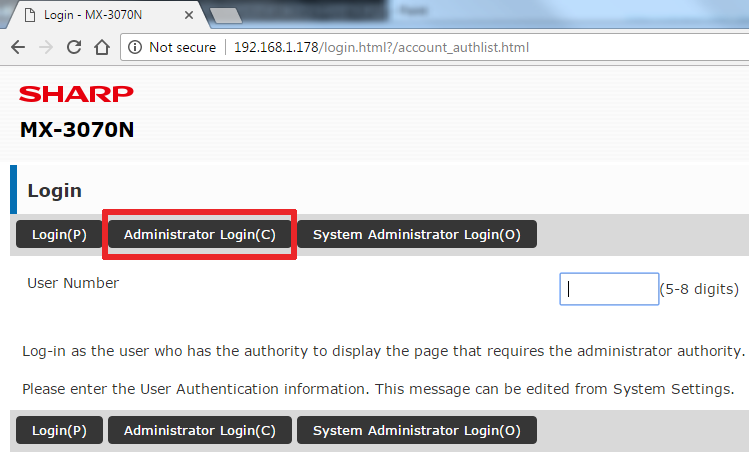
6. Type in your administrator password and click Login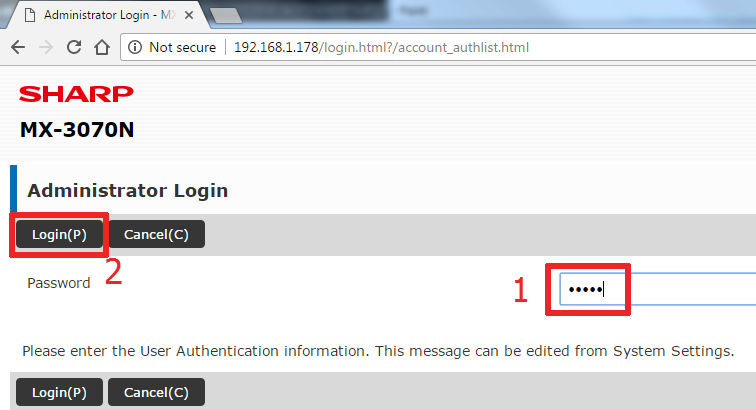
7. Scroll down a bit on the right side of the page, and click Add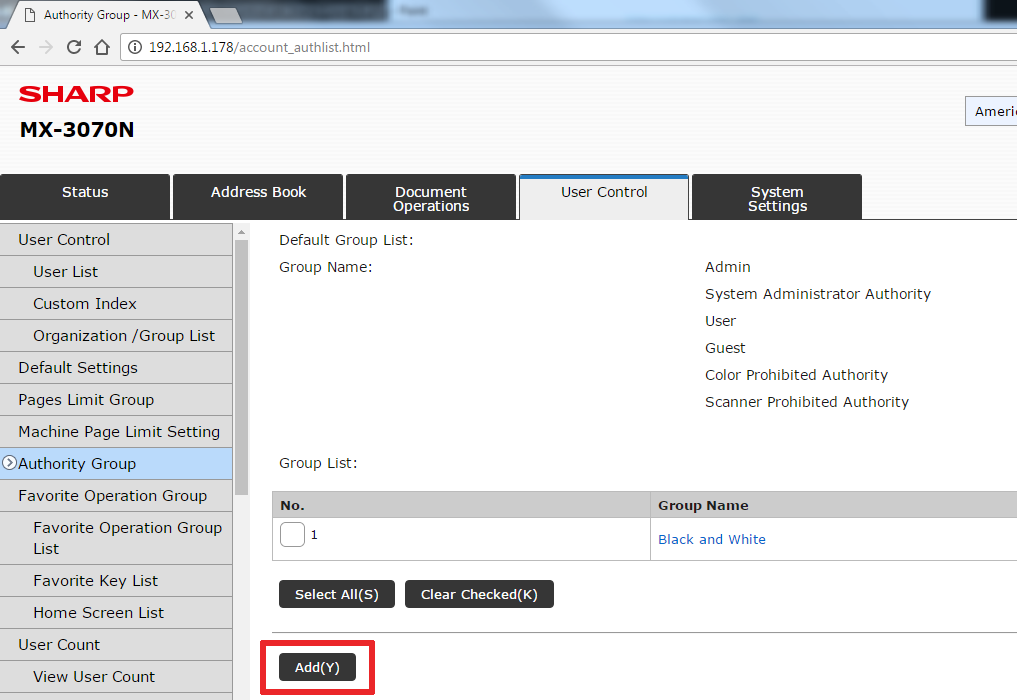
8. Name your Authority Group and scroll down the page to allow or prohibit whatever features you want this group of users to have access to, then click Submit.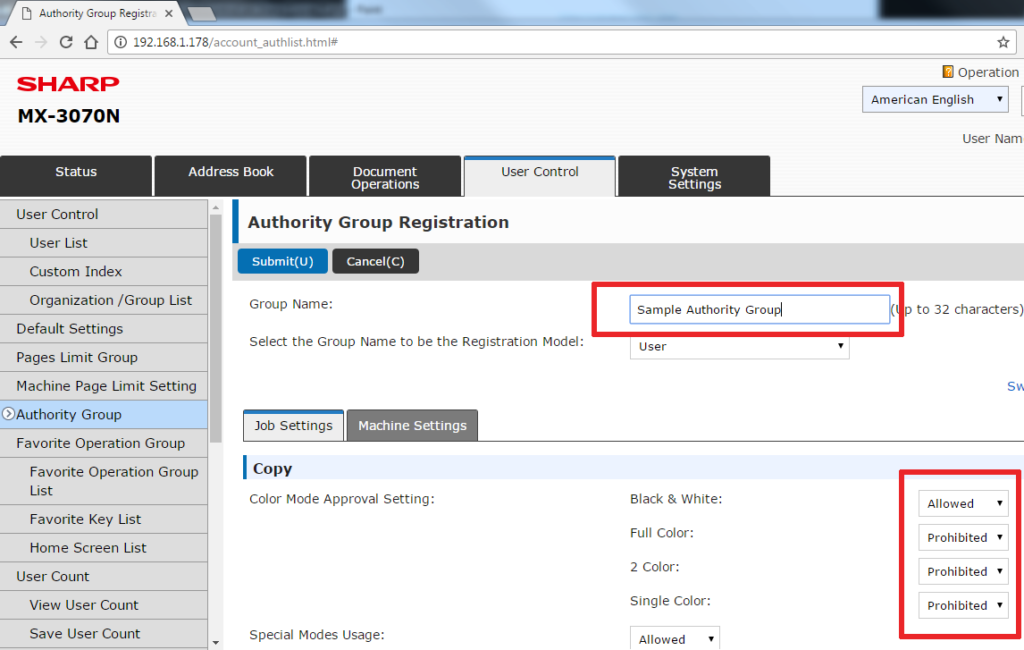
Creating Users
9. Click User List on the left menu, then scroll down and click Add.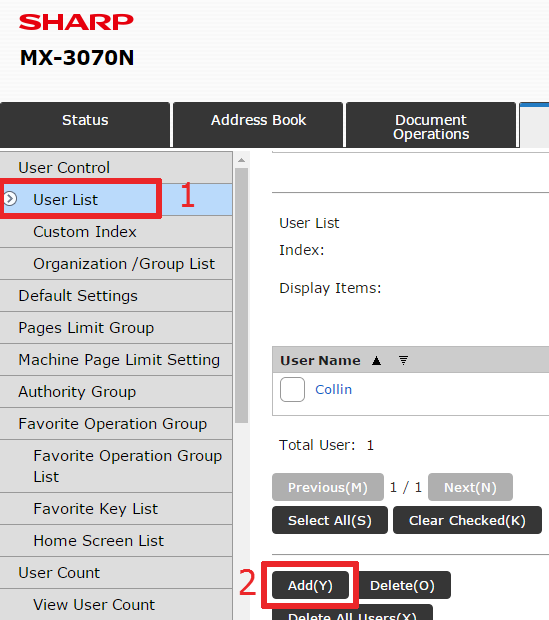
10. Name the user, then enter a 5-8 digit code (or a username/password) and fill out the rest of the information if you’d like(not required). Scroll down 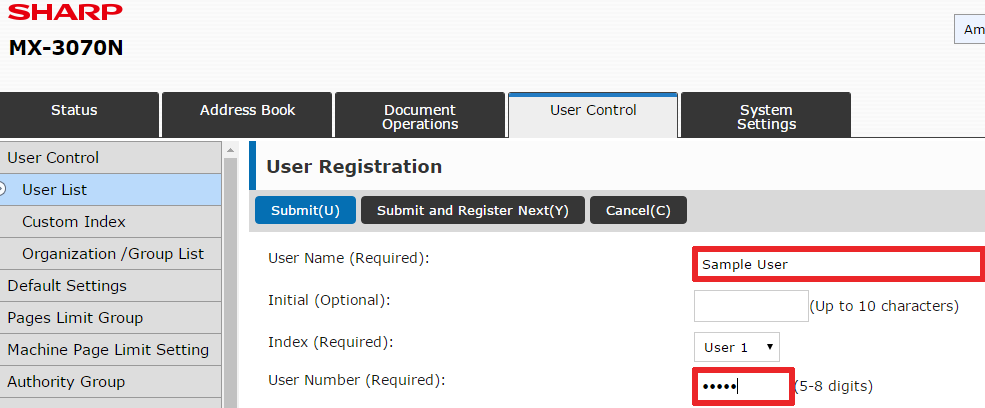
11. Scroll down to Authority Group, and choose the Authority Group you want this user to have access to, when finished click Submit.
*Note: leave the web interface open for now, there’s more to learn below.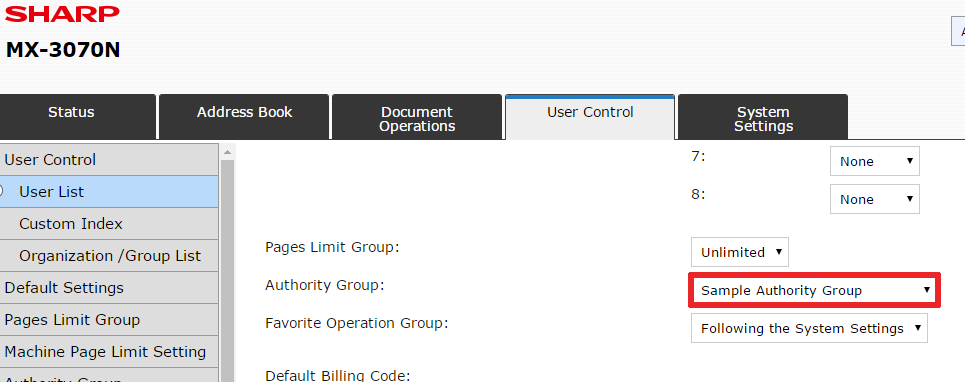
Setting up the Sharp Print driver with Code or Username/Password
12. Open your Devices and Printers menu, right click on the Sharp and choose Printing Preferences. 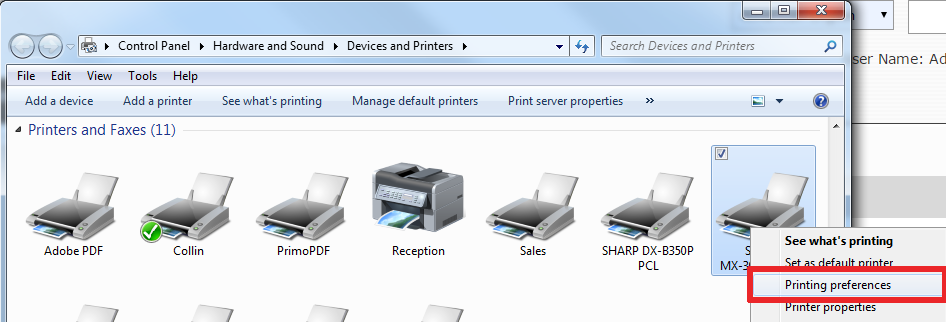
13. Click the Job Handling tab, then put the Authentication drop-down menu on the type of Authentication you chose, then enter the User Number or Username/Password into the appropriate box.
*Note: If you plan on printing using various codes, and will not use the same code every time, check the “Auto Job Control Review” box. This will tell the print driver to prompt the user for a code before each print job is sent to the printer.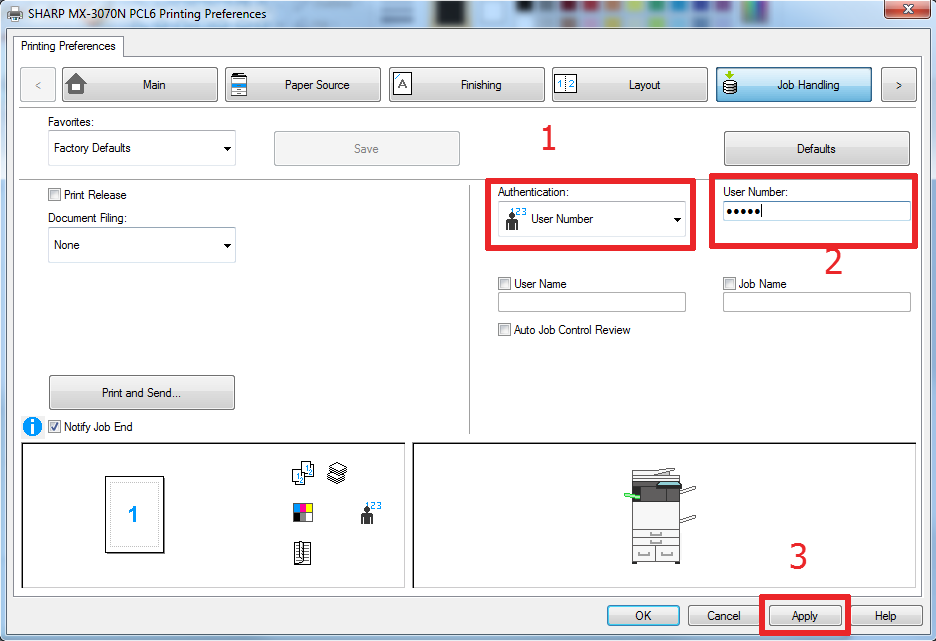
View, Save, and Reset User Counts on Sharp Copier
14. Back on the web interface, on the User Control page, scroll down on the left menu and click Save User Count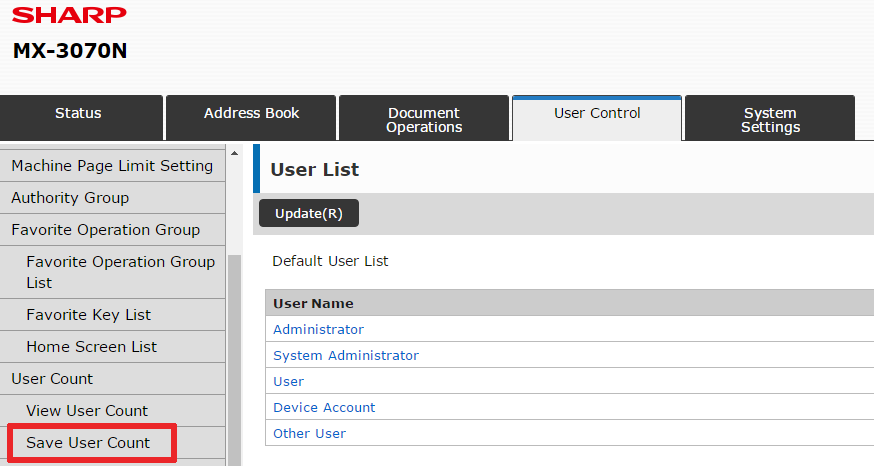
15. Before clicking anything on this page we need to determine what you want to do:
- I just want to view the amount of copies and prints each user has made – Just click the Save button
- I want to view AND RESET the amount of copies and prints each user has made – Check the Save and Delete the Data box, then click Save.
This will export an Excel file where you can view detailed counts on copies, prints, scans, faxes, and more data for each user.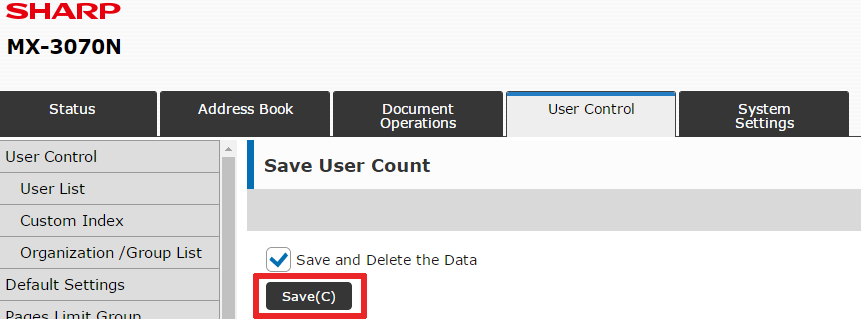
16. There is a lot of information on the Excel spreadsheet, but for billing purposes you’re likely only concerned with B&W copies, Color Copies, B&W Prints, and Color Prints. I’ve highlighted those columns in the pictures below. Columns B, E, N, Q.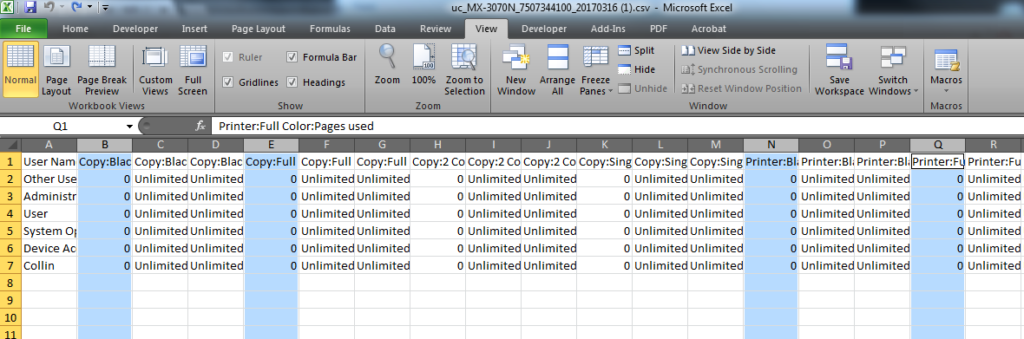
You’re all set!
Hopefully these instructions get you started on the basics of managing User Control on your Sharp copier. You can delve down as deep as you’d like into customizing the features, but the information above should get you started.