Address Book Management on Sharp Copier / Scanner – Learn to enter Email Addresses, Network Folders, FTP, and Fax Addresses
These instructions will give an overview of how to add various types of addresses to be stored in the address book on your Sharp copier / scanner. We will be covering the following:
- Adding Addresses
- Email Address
- Fax Address
- FTP Address
- Network Folder Address
- Editing Existing Addresses
- Deleting Addresses
Sharp Models these instructions pertain to: MX-3050N, MX-3070N, MX-3550N, MX-3570N, MX-4050N, MX-4070N, MX-5050N, MX-5070N, MX-6050N, MX-6070N, MX-6580, MX-7580
Managing the Address Book on your Sharp Copier
Adding Addresses
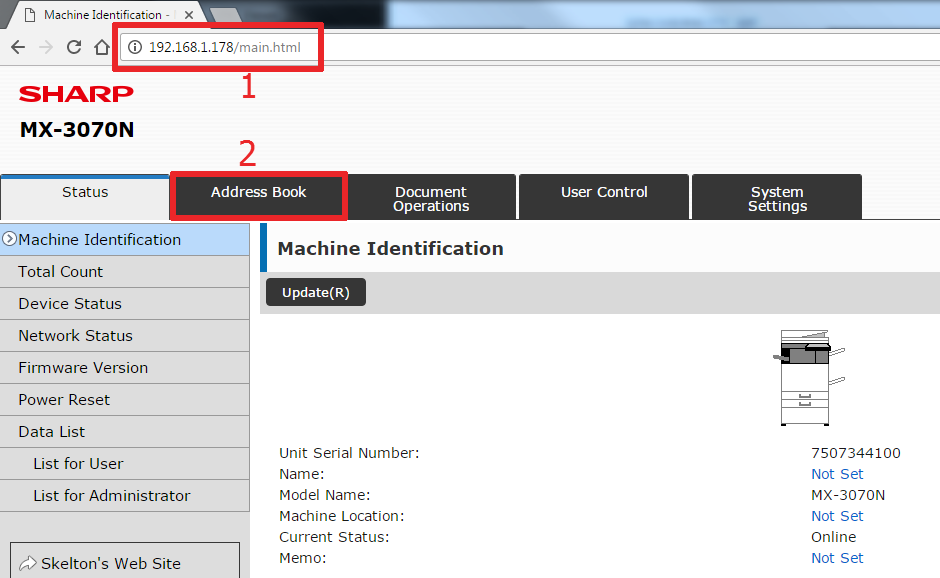
- Open the web interface of your copier by typing the IP address into your browser’s IP address bar. If you don’t know your copier’s IP address, you can get it by printing a NIC page. Once you have the Sharp web GUI open, click the Address Book tab at the top
- Scroll down a bit, then click the Add button

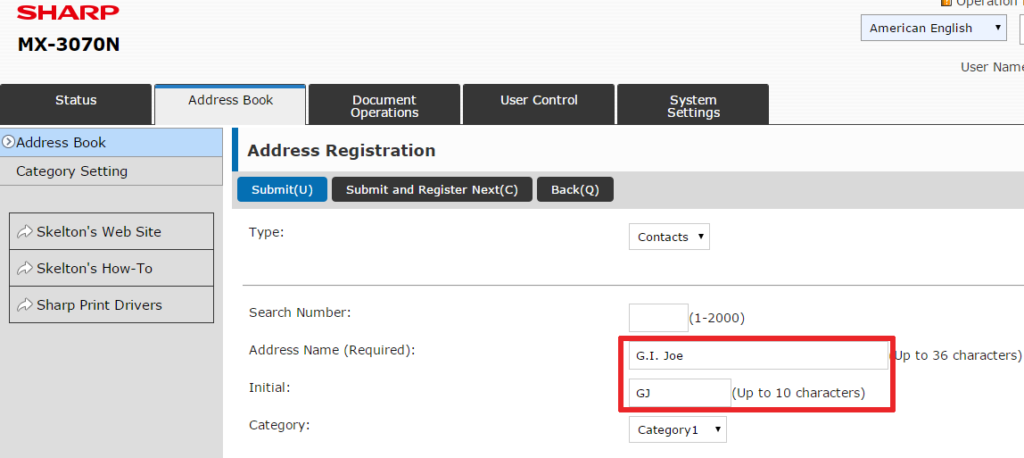
- Enter the Address Name – this is what the button on the copier’s touch screen will say. Then enter the person’s initials so the Sharp machine will file them in the correct order.
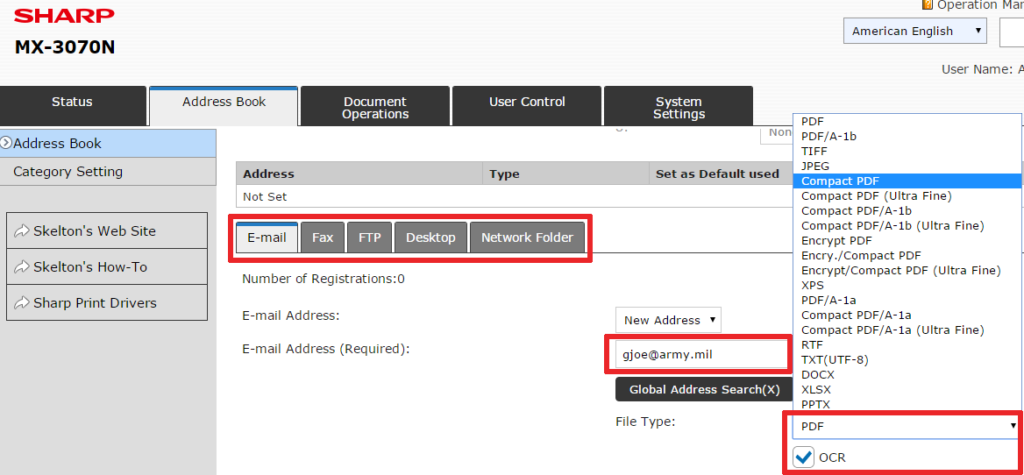
- Scroll down and choose the type of Address you want to create. For an email address, leave it on the Email tab, enter the person’s email address, and choose the default file type. If you have the Compact PDF in your options I recommend using it. When finished, click Submit, or Submit and Register Next if you plan on adding several in a row.
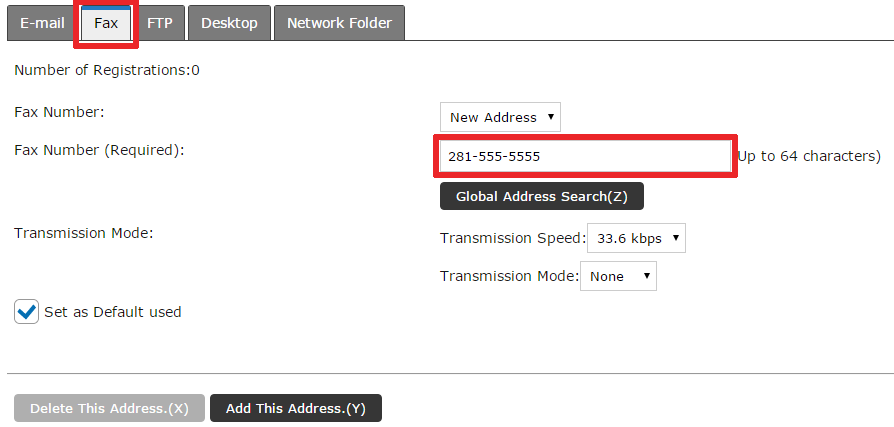
- For a Fax Address enter the name at the top of the page, a fax number, then click Submit, or Submit and Register Next if you plan on adding several in a row.
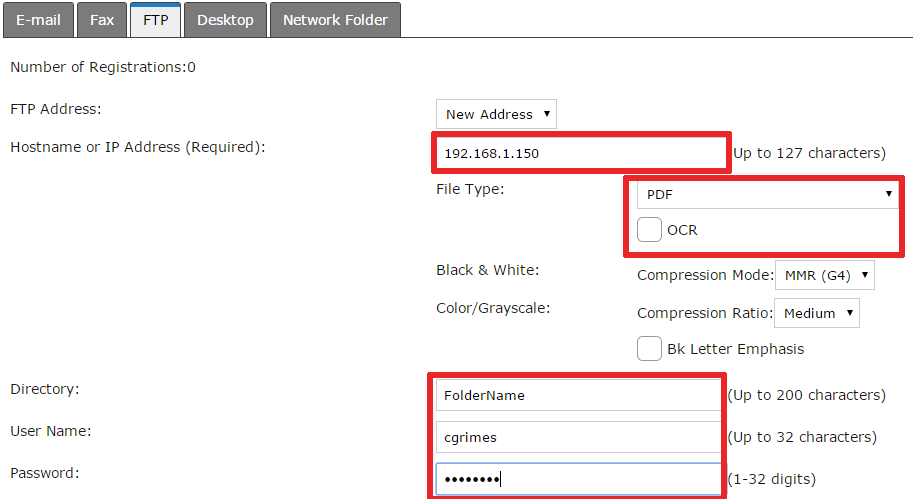
- For a FTP address enter the name at the top of the page, then fill in the FTP server hostname or IP address, choose your file type, enter a specific directory if you don’t want the scan to drop into the FTP root directory, and enter a network username/password that has rights to this directory. Click Submit when finished.
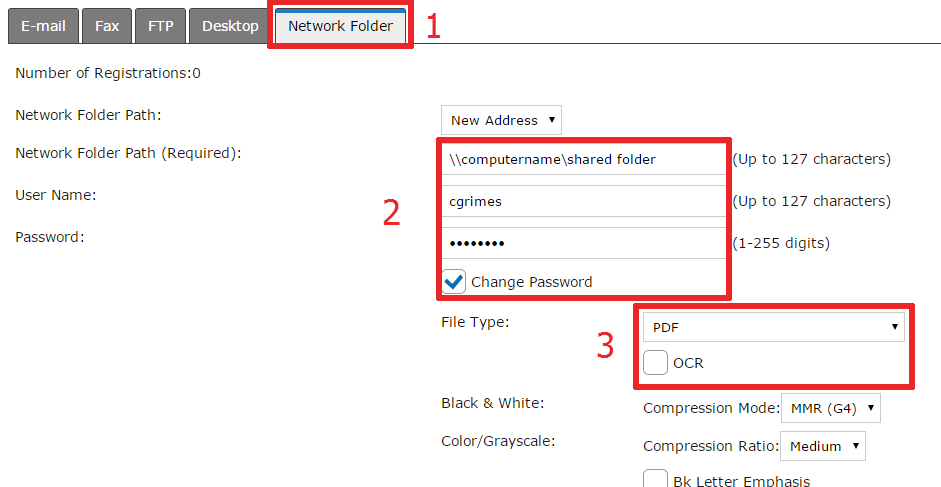
- For a Network Folder address enter the name at the top, then enter the Network Path to the shared folder, and a username and password for an account that has access to the shared folder. Choose your desired default file type, then click Submit when finished.
Editing Existing Addresses
To edit an entry in your address book:
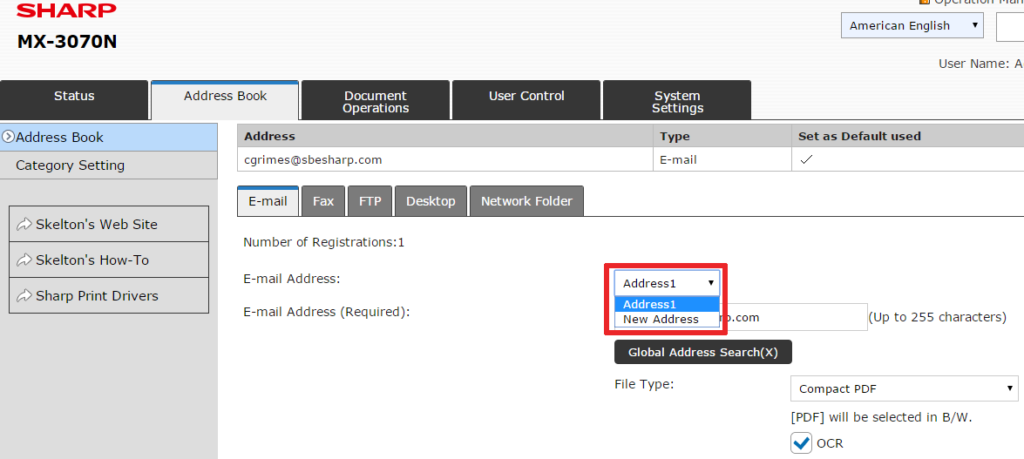
- Click on the address name (blue link)
- Scroll to the bottom of the page and click the appropriate tab for the type of address you are editing
- Choose “Address 1” from the drop-down menu just below the address type tabs
- Edit your settings and click Submit.
*Note: this is handy for misspelled emails or network folder paths, or to change a password on a network folder that is using an account with a new password
Deleting Addresses from your Address Book
This is very simple. Put a check next to the address(es) you want to delete, and click the Delete button at the bottom of the page. Click OK on the pop-up at the top of the page to confirm. 
This concludes the instructions for adding, editing, and deleting addresses from the address book on your Sharp copier. If you have any questions, please leave a comment below or contact us through our contact page.